I play LEGO a lot with my daughter, and I’ve been obsessed with making spheres. My last sphere building attempt was building a mini LEGO Earth in 2009. While I enjoyed the project, it was also clear to me that there is a room for improvements.

The main issue is that the the “pixel resolution” of LEGO is rather low that many of the distinctice coast line shapes are just not visible. I also later discovered off-by-one bug in the program that I used to compute the color assignment to tiles, which skewed the projection around seams.
So around March last year, I decided to build a bigger version of it, at the whopping 3x scale of the earlier project. This will surely give me enough resolution!
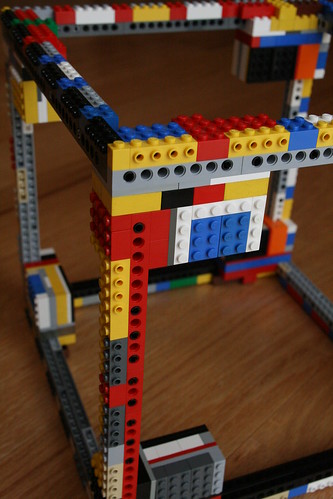
The construction starts with building a 36x36x36 stud cube from LEGO technic beams. The studs are facing all 6 directions.

The lumps at corners are for changing the stud direction as well as for supporting the structure.
The idea is to basically build six peels and put them on the surface of this cube, completely covering the cube:

Each peel is big enough that it needs its own support structure. When attached to the cube, the center of each peel will not be connected to anything, so it needs to be fairly sturdy. It would be fun to write another program that does the structural analysis and figure out how much support would be adequate. Perhaps a TODO for the next version. The clipboard you see on the left is the instruction computed by my program
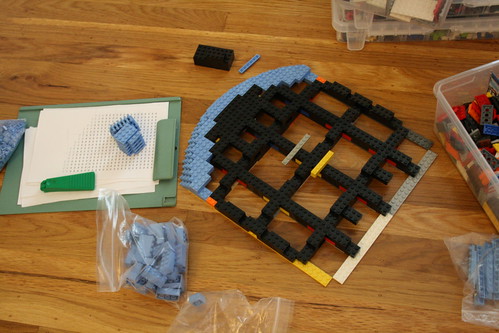
The support structure is mostly made of 2×4 bricks. Just for this purpose, I bought several 1000s of them:

On this support structure, I then built up the arch over it. One section is almost complete!:
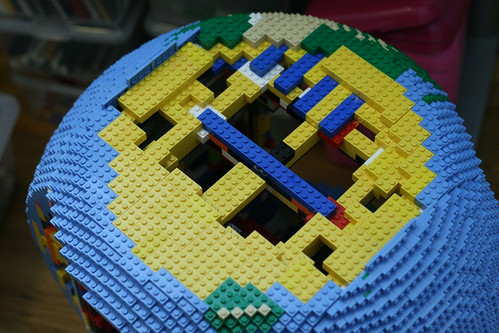
One thing I wasn’t too careful about in the planning phase was the seasonal change of the Earth surface.

The image I based the texture mapping on didn’t have any sea ice, so I use a different source to add in sea ice. Unfortunately, those two sources did not agree on the season. If you look carefully, the sea ice is the winter level, but the land ice is the summer level:
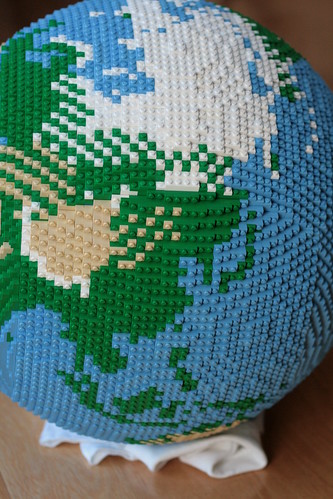
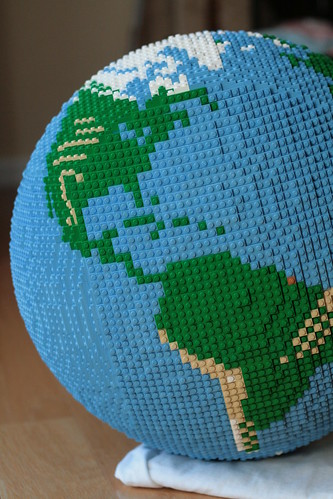
On the positive side, the higher resolution really paid off. Here are two Earths side by side, showing the same side.
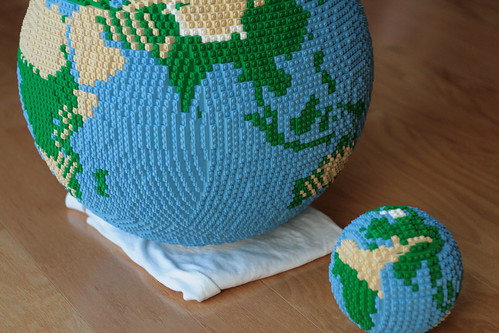
We are used to seeing the Earth as a two dimensional map projection, so our mental image of the Earth is quite skewed. Building an actual sphere was quite an enlightening experience, as I get to really look at the actual proportions of things. For example, I used to think that when I fly from the US to Europe, I’m going about one third of the Earth, but it turns out it’s more like just one fourth. Africa is really, really large, and the mouth of Amazon river is so vast that the brown area caused by the river-carried dirt stretches a hundred kilometers. For that I gave is a distinctive brown tile:
This version of Earth is about one meter across. It’s quite heavy, but I can still carry it by myself.
Once I assembled it, I still had some more fun by calculating various numbers based on this scale.
For example, the highest point of the Earth, Mount Everest in Himalayas, is only about 0.3mm tall above the sea level. That is, it’s not even one tenth of a LEGO plate high. In fact, he whole Earth crust is only about 30km deep, so that’s only a half LEGO plate high. If I wanted to correctly model the interior of the LEGO Earth, then I have to basically build a red sphere all the way, except the top-most plates. It’s almost like we are living on the egg shell, and no wonder the continents moves over time!
In the same scale, the Sun would be about 50m (200ft) in diameter at 6km / 4miles away. That’s big enough to comfortably fits the Statue of Liberty inside. Someone please build that in LEGO and we will put that and my Earth together at the accurate distance!
Finally, if you put this Earth in my home at San Jose, the furthest man-made object, Voyager 1, is past San Diego and into Mexico, flying at the speed of 1.5m/h. Picture a garden snail that crawls past the LEGO earth, slow that down 100 times, and that’s about the speed of Voyager 1. No wonder it took 35 years to get there — go Voyager!
Anyway, that’s it. Now that I’m finished with this project, what am I going to build next?